| Info |
|---|
The Google Photos app will be removed from CNU Google accounts on Jan. 16, 2025. Because CNU does not have administrative control over the content placed in the Photos app for university Google accounts, once the Photos app is removed, the university will not be able to retrieve any files left in your account. Moreover, any data left in Photos after the app is removed will count against your Google storage allocation. |
All users need to do the following:
- Disable any automatic photo uploads or syncing from your phone or other devices to your CNU Google Photos app (If you don’t have that feature enabled, you can skip this step).
Expand title Turn Off Photo Sync | (Click to Expand) - Open the Google Photos app .
- Sign in to your CNU Google Account.
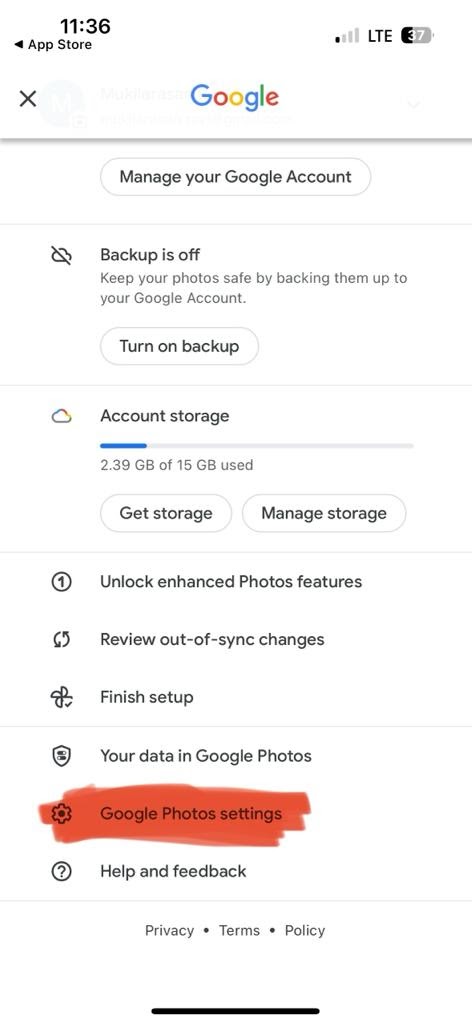
- At the top right, tap your Profile picture or Initials.
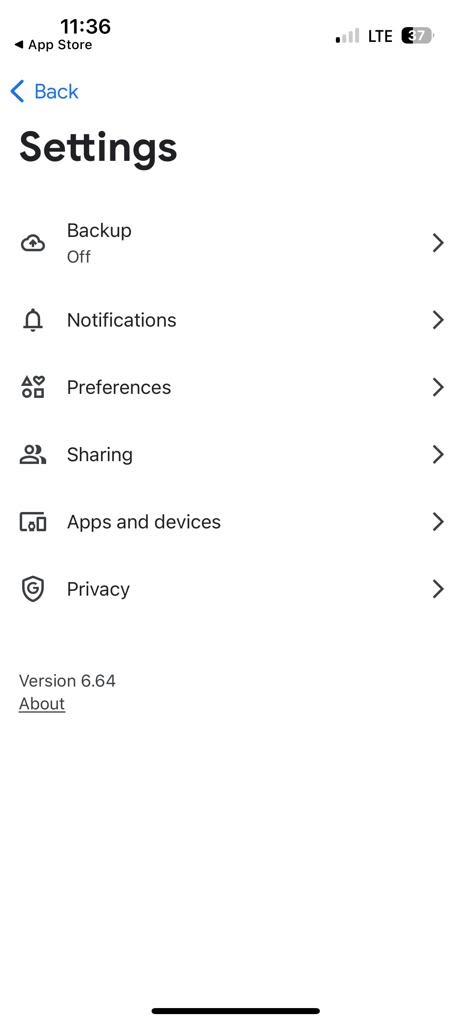
- Tap the Google Photos settings > Backup.
- Turn Backup off.
- Export and move any files that you wish to keep from the Photos app on your CNU Google account to an alternative storage location.
Expand title Using Google Takeout to Download Data - Visit Google Account Data and Privacy.
- Scroll down until you find the Download or delete your data section.
- Click Download your data.
- Scroll through the first section labeled Select data to include and choose which products you want to download (Ensure to include all Photos).
-
Info You may have issues if the drive is over 100 GB. If you experience difficulties, try downloading the data directly.
To help ensure the best transfer, it is also recommended that you delete any unwanted files first to limit the amount of data you are trying to export.
Also, ensure that you are not downloading business data to a personal account as it may contain sensitive information.
- Once you have made your selections, click Next step.
- Select your preferred Delivery Method, Frequency, and File Type & Size. It is recommended to use a file size of 10 GB.
- Click Create Export.
- This process has been known to take up to a day or so.
- A box will appear labeled Export Progress, allowing you to cancel the export or create another one.
You will receive an email when the process is complete.
...


